How To Create A Leader Account

Welcome to the Back On Stage App! You are about to experience the best artist management app in the market! This innovative software is designed by musicians, for musicians, to save you TONS of time and money, so you can get out of the office and get back on stage!
What Is A Leader Account?
If you are a bandleader or manager of a music project and you own the band or music project, you will want to sign up for a "Leader" account. As the leader, you can manage all the aspects of your music project including inviting more members (musicians and staff) to your project and adding admins to your team too.
With a leader account, you can create as many companies (bands) as you like and invite as many members or admins to them as you like. It's just one small monthly fee to unleash your bandeader superpowers!
In the video below, we outline how to:
Create your account:
On the "Start Using Back On Stage" page, fill out your PERSONAL details. You need to provide this information so that Back On Stage can identify you.
If you want to take gigs with other bands or music projects (ie: you are a musician, or you are a bandleader who plays with other bands too), this information will will be used on invoices that Back On Stage generates for you when your bandleader pays you.
Make sure it's accurate and keep it up to date!

What will you use Back On Stage for?
In this section, select the "Leader" if you run your own band. Otherwise, just select "Musician". If you select "Musician" now and later decide you want to run your band with Back On Stage, you can always upgrade to a Leader plan later.
It's also worth noting that if you are joining as a musician without having recieved a prior invitation from a band you work with, you won't be able to do much inside Back On Stage. Bandleaders and admins are the only ones who can create new bookings and data inside Back On Stage, so you won't be able to do anything if you're just a "Musician" with no bands or gigs to belong to :(.

Once you have completed your personal profile information, click "Create My Account"
Setup Your Company (For Bandleaders)
This step is for users who chose the "Leader" option. On this page, you need to input your compnay's (band's) information.
This is how your band's information will show up on contracts and invoices you make for your clients as well as gig offers sent to your musicians. Make sure it's accurate and pretty!
Don't worry if you make a mistake here, you can always edit this info later in your Company Settings.
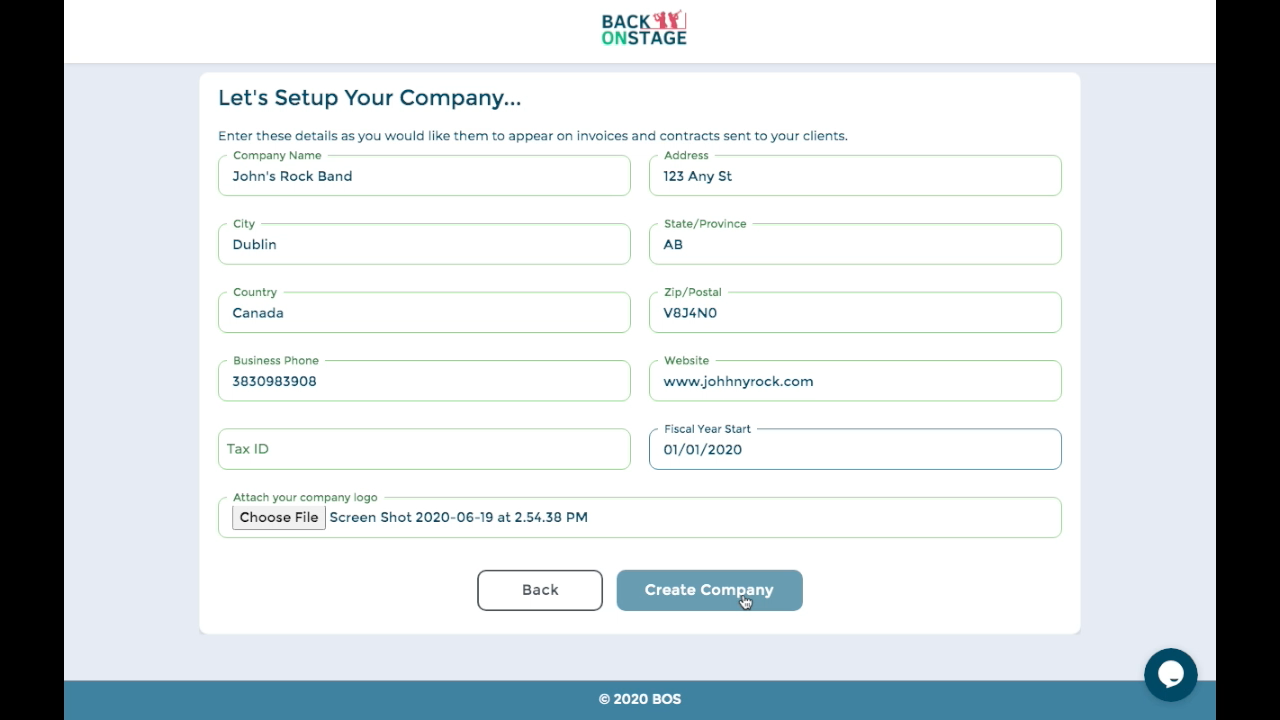
When you're done, click "Create Company".
Add or Import Members

Next, you will need to add Members to your music group. You can choose to invite members one at a time or save time by using a spreadsheet to bulk upload all your members.
Add individual members
To add individual members, just fill in the fields and hit "Send Invitation". An invitation will be sent immediately.

Bulk Upload
For larger ensembles, uploading a spreadsheet of all your members can save a lot of time. To do this, you will need to fill out and upload the Member Import Template.
Get Member Import Template (Google Doc)First, click the button above to get the Back On Stage Member Import Template. Then follow these steps:
- Create a copy of the document by selecting File >> Make A Copy. Save the copy to your own Google drive
- Add your contacts to the spreadsheet. Do not touch the headers in Row 1.
• First Name: alphabetical characters only. No special characters or numbers.
• Last Name: alphabetical characters only. No special characters or numbers.
• Email: valid email only. Example: john@sample.com.
• Phone: (Optional) must be a valid 10-digit phone number and contain numbers only (no dashes, spaces or brackets). - Delete the instructions from the spreadsheet
- Choose File >> Download >> Comma-separated values
Once you have downloaded the document, you can upload it to the Bulk Upload section inside Back On Stage by clicking the "Choose File" option.
IMPORTANT:Before you sign your band members up for Back On Stage, make sure you send them THIS LINK that will give them a step-by-step tutorial on how to set up their musician accounts.
All the members will be immeditely imported. Any rows with errors will not be imported. We'll let you know wich ones these are so you can correct them and re-upload your spreadsheet.

Once you're done importing members, click "Invite Members".
Create and Assign Roles
Inside Back On Stage, "Roles" refer to the various jobs that each person is responsible for in your band.
Roles are best configured as singular nouns. For example:
- Tenor Sax
- Bass
- Guitar
- Trumpet
In the space provided, enter one new role per line and press enter to separate them. When done, click "Create Roles"
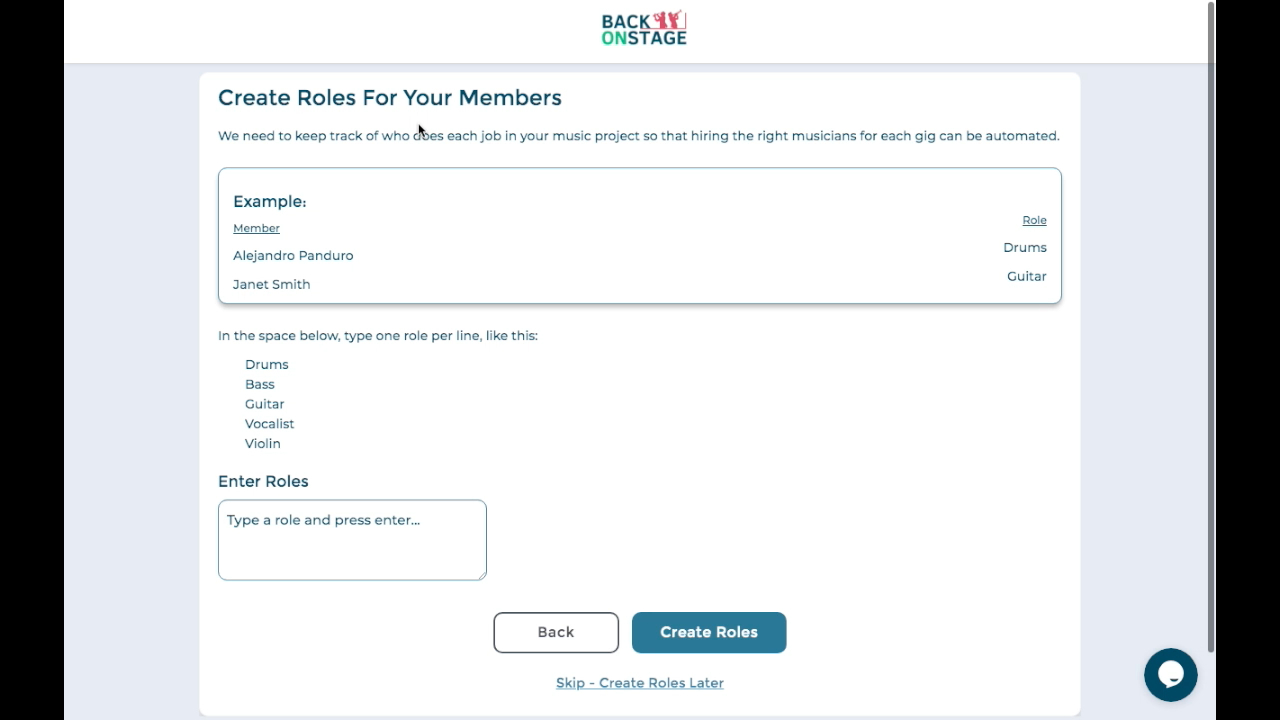
Assign Roles
Now that we have added members AND created roles, we can match them up! On this page, click on the role or roles that each member fulfills within your band.

Don't worry if you make any mistakes here. You can always edit roles in your Company Settings.
When everyone has been assigned to a role, click "Assign Roles".
CONGRATULATIONS! You have just successfully set up your basic company details on BOS. You can now explore all the amazing functions on the Dashboard by pressing the “Take Me To My Dashboard” button.
Import Bookings
Lastly, we're going to look at importing bookings. We're assuming you haven't just started your band from scratch and that you already have some bookings. So let's import them into Back On Stage!
Booking Import Template (Google Doc)First, go ahead a click the button above to grab our Back On Stage Booking Import Template. Then follow these steps:
- Create a copy of the document by selecting File >> Make A Copy. Save the copy to your own Google drive
- Add your bookings to the spreadsheet. Do not touch the headers in Row 1.
- NOTE: All headers with '*' (in red) are mandatory. These include:
- Event Date
- Event Title
- Booking Status
- IMPORTANT: Make sure your dates (column A) are in this format:
2020-12-24 (yyyy-mm-dd) - When finished, choose File >> Download >> Comma-separated values
To upload this list of bookings to your Back On Stage account:
- Navigate to "Booking List"
- Click "Import CSV"
- Choose your newly created file and click "Upload"
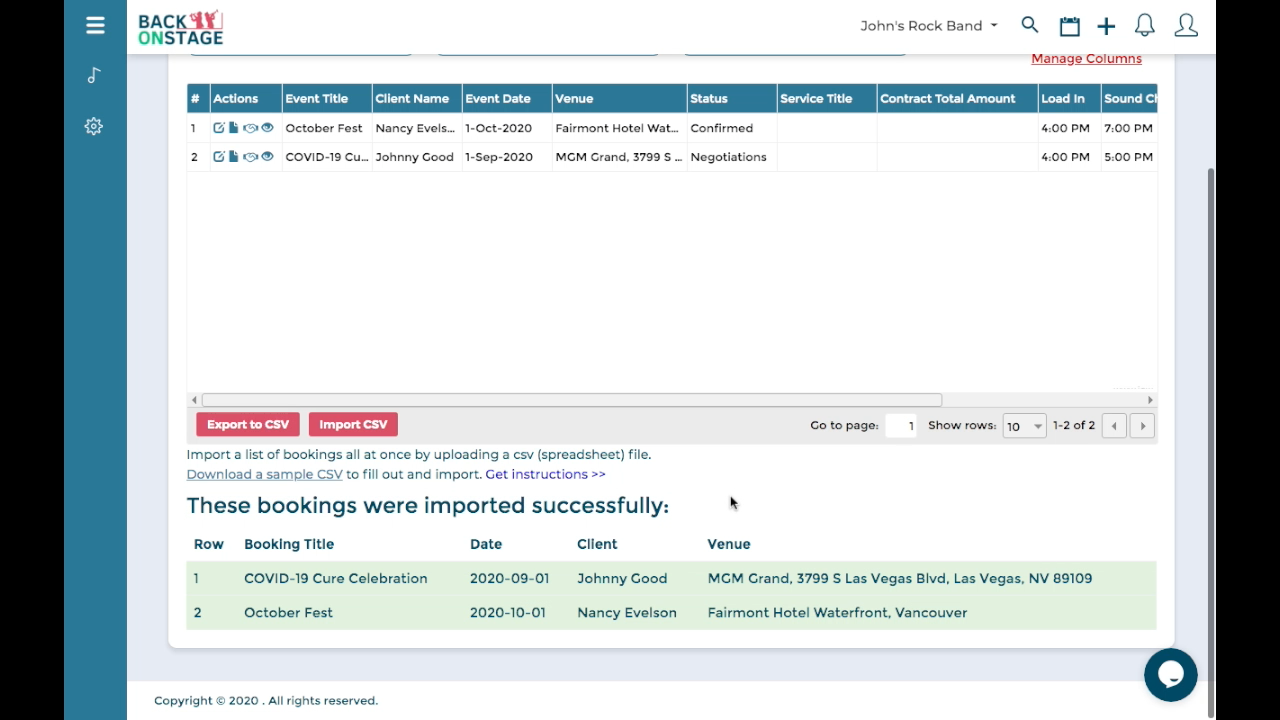
All the bookings will be immeditely imported. Any rows with errors will not be imported. We'll let you know wich rows have errors so you can correct them and re-upload your spreadsheet.
Warning!
DO NOT SIMPLY CORRECT THE ERRORS IN YOUR SPREADSHEET AND UPLOAD THE ENTIRE DOCUMENT AGAIN. This will duplicate all the bookings that imported properly the first time. Instead, note which rows had errors, then FIX ONLY THOSE ROWS AND DELETE THE REMAINING BOOKINGS BEFORE UPLOADING YOUR DOCUMENT AGAIN.
PRO TIP: If this is your first time importing bookings, try 5-10 at first to see how it goes. It's frustrating to try 300 all at once and discover that 298 of them have errors and can't be imported!
Hopefully you found this tutorial helpful. Please let us know in the comments below if we missed anything!
In a hurry? Here's the short version.
- Choose a path: Musician or Bandleader
- Setup your Company
- Add or Import Members
- Create and Assign Roles
- Import Bookings


